 Composal
Verify
AWS Client VPN
Connect Verify browsers to private AWS services with certificate-authenticated AWS Client VPN.
On this page
Test an app inside your VPC
Connect Verify browsers to a private web app or API with AWS Client VPN. Your API can remain behind an internal load balancer while the frontend, sign-in provider and S3 remain public. You need an AWS administrator to prepare the endpoint and a Composal organization administrator to save the connection.
The VPN provides network access. Add an application test account separately on the project's Credentials page if your journey needs to sign in.
Prepare the AWS endpoint
Use a dedicated endpoint with mutual certificate authentication, IPv4 traffic and split tunnel enabled. Interactive SAML, password and MFA enrollment are unsupported. Use a dedicated client certificate for Composal so you can rotate or revoke its access independently.
- In the Amazon VPC console, create or select a Client VPN endpoint. Associate a target subnet and wait until the endpoint is available.
- Set authorization rules and routes for the private service's network. An authorization rule grants access to a destination CIDR; it does not restrict a port. Restrict the application or internal load balancer's security group to the required port, such as HTTPS on TCP 443, from the Client VPN endpoint's security group. Apply the endpoint security group to its target network association.
- If the API uses private DNS, configure DNS servers that VPN clients can reach and allow that access too. If public DNS already returns the API's private IPv4 addresses, you can keep using those records. A public DNS record does not make the API publicly reachable.
- Keep public services off the VPN route table. Verify uses ordinary internet access for public frontends, identity providers and presigned S3 uploads. Private addresses and destinations on advertised VPN routes use the tunnel. Full-tunnel default routes are unsupported.
Certificate-authenticated endpoints share their authorization rules across connected clients. A new certificate alone does not narrow a broadly authorized endpoint. A dedicated endpoint with narrow routes, authorization rules and service security groups gives you a separate access boundary.
See AWS's endpoint setup, authorization rules and security group guidance for the AWS-side configuration. AWS endpoint and connection charges remain in your AWS account.
Prepare the client profile
Download the endpoint's exported .ovpn client configuration. Keep its inline CA block and add your dedicated client certificate and unencrypted private key inside inline blocks:
<cert>
PASTE YOUR CLIENT CERTIFICATE HERE
</cert>
<key>
PASTE YOUR UNENCRYPTED CLIENT PRIVATE KEY HERE
</key>
These blocks are additions to the exported configuration, not a complete profile. Follow AWS's certificate and key instructions. The endpoint hostname must be the exported AWS hostname; UDP or TCP on port 443 or 1194 is supported. External certificate files, encrypted private keys and custom scripts are unsupported.
Treat the whole profile as a credential. Paste it only into the connection form; do not put it in chat, a Scenario or a screenshot.
Configure the connection in Verify
An organization administrator can save the connection. Follow the numbered callouts below.
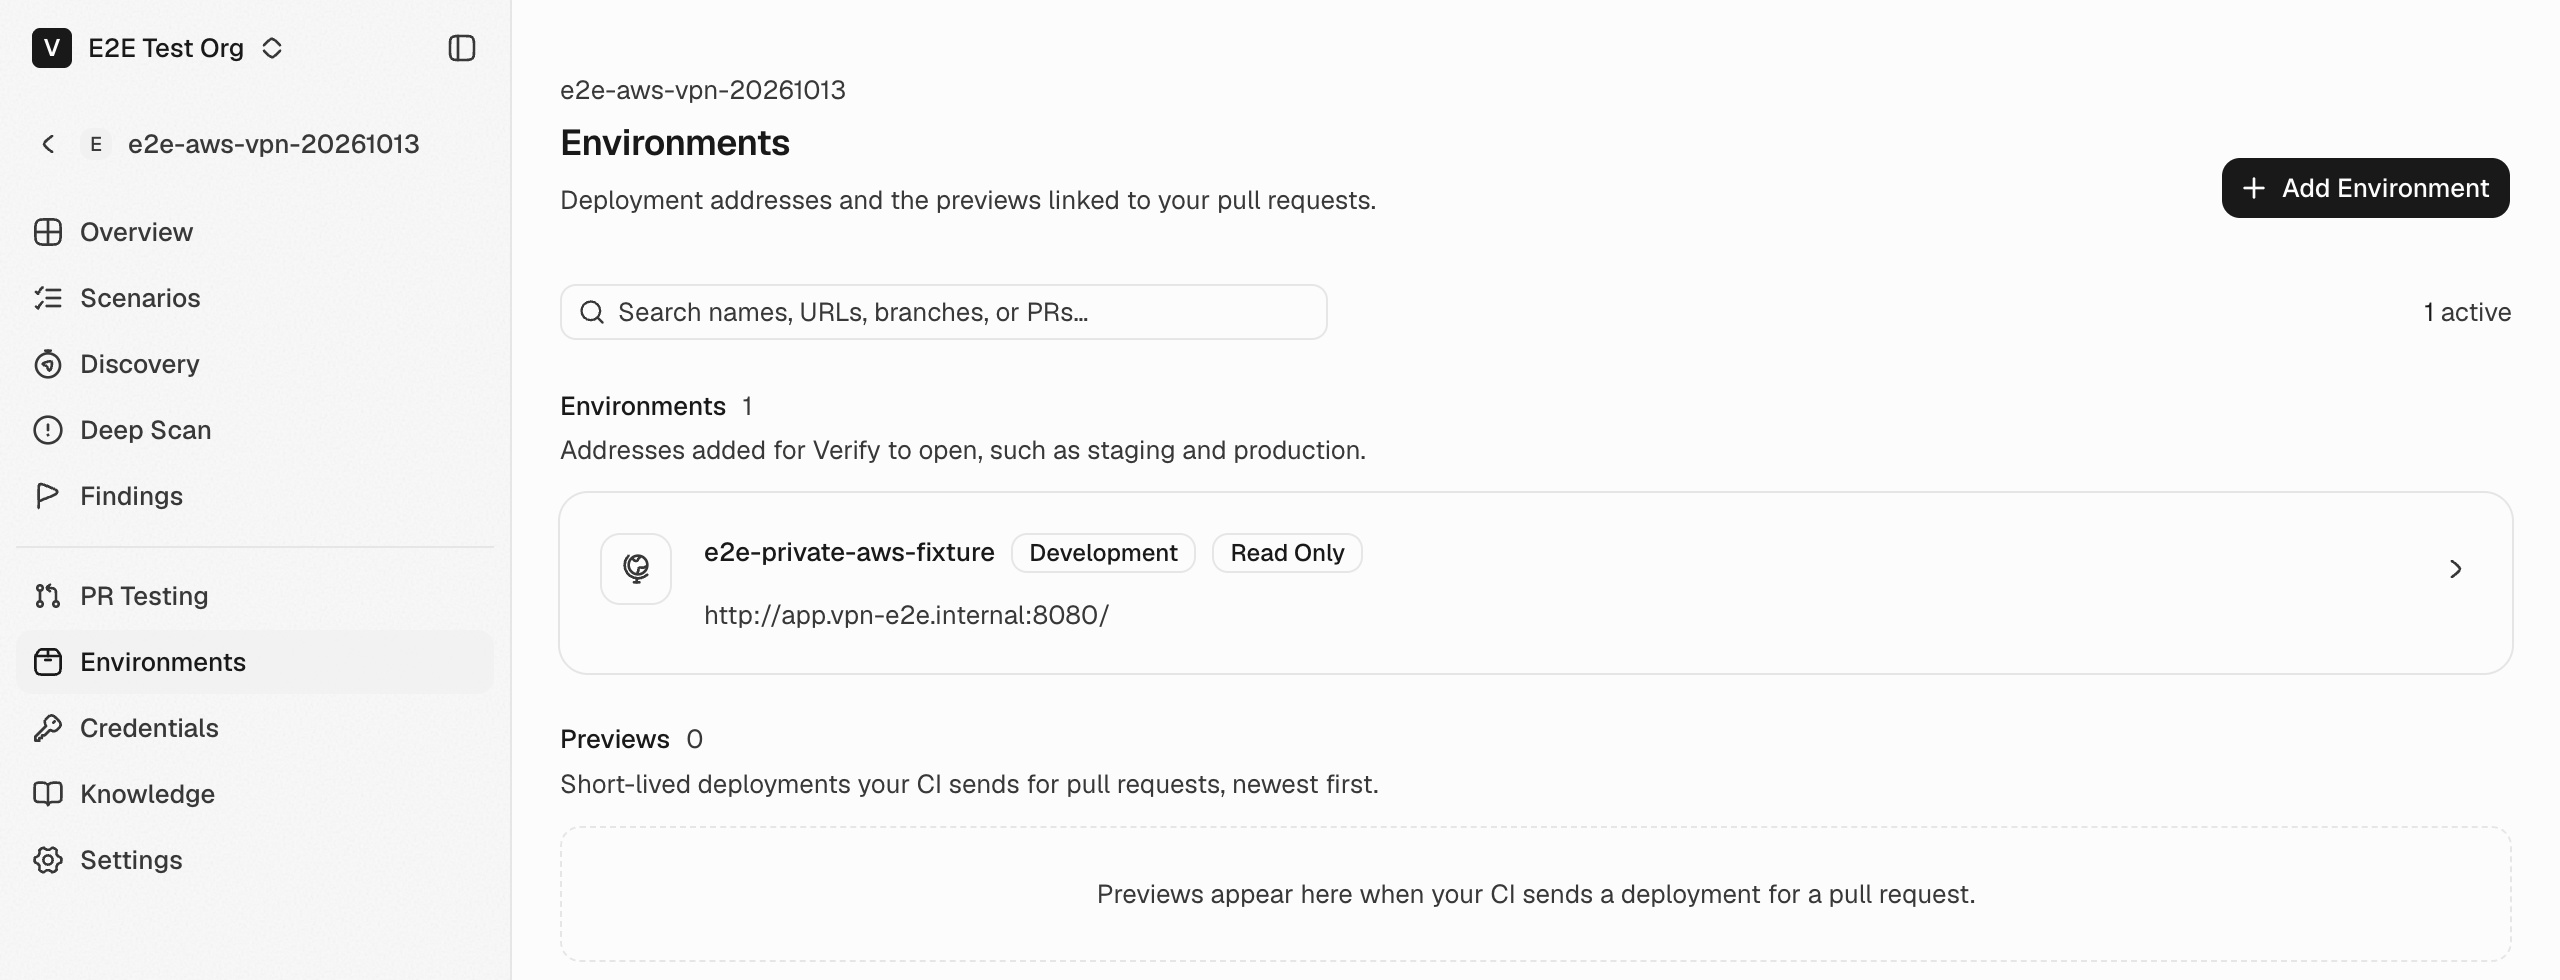
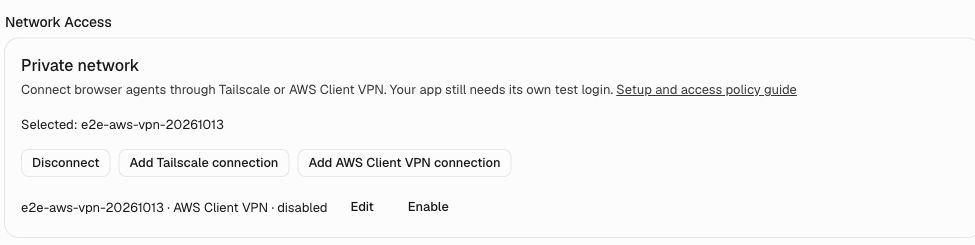
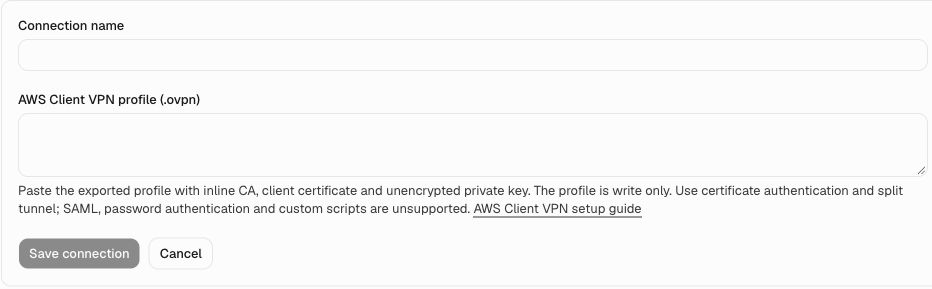
After saving, select the connection if another one is already selected. Confirm the card shows your connection name as Selected and its status as active. A saved connection alone does not prove the VPN can reach your app.
Set the environment URL to the app you want to test. For a public frontend with a private API, use the frontend URL; its browser calls reach the private API through the VPN. Keep your normal application hostnames and TLS certificates so redirects and session cookies use their intended domains. Run a short Discovery scan or Scenario and review its pages, network events and recorded evidence.
For a standalone environment, open Verify → Environments and use the same Private network card.
Composal encrypts the profile at rest and never displays or returns the saved profile. To rename the connection, choose Edit and leave the profile field blank. To rotate it, paste the replacement profile and save. Choose Disconnect to stop using the connection for this environment, or Disable to prevent new runs from obtaining access through the connection.
Check access and troubleshoot
Start with a page that calls the private API. Loading a public frontend alone does not prove VPN access. For a signed-in journey, check the private API request, public identity-provider redirect, private callback and authenticated API response.
| Symptom | Check |
|---|---|
| The profile cannot be saved | Exported AWS hostname, inline CA/certificate/key, matching key, certificate expiry and supported authentication. |
| VPN enrollment fails | Endpoint availability, target network association, client certificate trust and revocation, transport and port. |
| The hostname cannot resolve | Endpoint DNS servers and the route, authorization and security rules needed to reach them. |
| Private requests time out | Destination route and authorization CIDR, application security group, listener port and service health. |
| Sign-in fails after the frontend loads | Private API and callback reachability, the configured application test account, cookies and the app's cross-origin configuration. |
| A presigned upload is rejected | The application's signed request headers and body. The VPN does not rewrite them. |
Streaming API responses and uploads continue through the browser's normal HTTP connections. If the tunnel fails, private browser traffic stops; it does not fall back to the public network. Start a fresh run after correcting the connection.
Rotate or revoke access
Disabling a connection prevents new grants but does not immediately terminate an existing VPN session. For immediate revocation, cancel active Verify runs and terminate the endpoint's active client connections in AWS. Revoke the dedicated client certificate through the endpoint's certificate revocation list to prevent future connections. See AWS's connection management and certificate revocation.
Private-network access applies to Verify browser runs for the selected environment. The separate owner-operated cloud login browser does not inherit this connection. Configure a test account that the agent can use directly for a private login URL.
Continue with Credentials for application sign-in, or Verify to run Discovery and Scenarios.